Your new Best Friend for the Summer
I live near a community center, and this past week a group showed up offering some beautiful produce at excellent prices – you KNOW I had to take advantage! In addition to the ingredients for my perfect pickles I couldn't resist the first big beautiful sun ripened tomatoes of the season – and wouldn't you know it? I caught the news as I walked back into my house and Mr. Food was presenting just the right way to use them!!
That's right – Mr. Food! I miss Art Ginsberg, the one and only, but Howard does a decent job in keeping the tradition alive – simple, straightforward weeknight cooking. Today's entry was Summer's Best Tomato Pie – and it was a hit for Father's Day.
You don't have to, but I made my own pie crust. And using Ree Drummond's Thyme Pastry recipe (dried basil instead of thyme) I did it all in the food processor! Cube your butter and freeze it for at least half an hour- I chill my water and vinegar as well. Flour, salt, and herb in the food processor with butter on top, pulse about 20 times. Then with it running on low add the egg and then spoon in your vinegar and water as needed. Done! You pre-bake that slightly
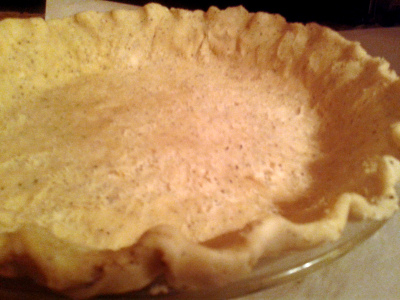 and fill with thin slices of big juicy tomato – I ended up using three. IMPORTANT: use a scoop, the SAME scoop, to measure your three creamy ingredients! A half cup of mayo is a lot less than you might think, and adding too much will ruin this!!! It's the balance that keeps this creamy with just a touch of of that tang. Okay, I added a little more pepper than it asked for... I mean, a quarter teaspoon is nothing
 Mix well and pour it on and smooth the top. I added that little slice on top just so our guests would know what was inside
  Honestly, I forgot to sprinkle with the parm until after it was in the oven, so I didn't add it until it was almost done. Didn't add much flavor but it did add a little texture and color.
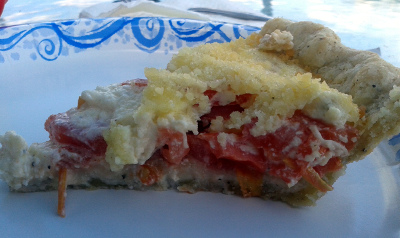 We served it room temp and between the time I set it on the table and reached for my camera...
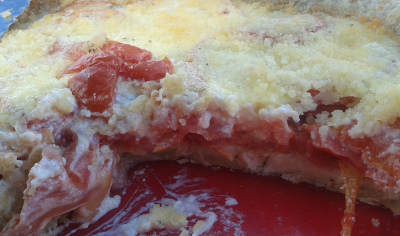 THIS happened! This will DEFINITELY be made a few times this summer – as an appetizer, a side, or even a light meal in itself.


 Honestly, I forgot to sprinkle with the parm until after it was in the oven, so I didn't add it until it was almost done. Didn't add much flavor but it did add a little texture and color.


This just screams Summer!
Trying to eat healthy with a crazy ever-changing schedule is tough. But here's a good start – this Tex Mex style salad is loaded with protein and veggies, goes together in minutes, and makes a mountain!
The recipe suggested using rotisserie chicken, but as I had some boneless breasts in the freezer I poached those – like 10 minutes once the water boiled and actually easier to dice 
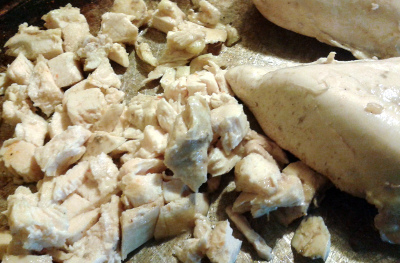 I cooked three, but two were more than enough... Dicing tomatoes, a cucumber, pepper jack cheese (yum!), slicing scallions - another five minutes? Chopped the cilantro in seconds... Rinse canned beans, measure some frozen corn kernels...
 Isn't that awesome?!? I have to admit, I used my hands to toss this all together! Please note – I hadn't added the lettuce yet as I wanted to highlight all the other great stuff. Very glad I hadn't started there, as my six quart bowl is almost full WITHOUT IT!
The dressing could use some tweaking – while it didn't say so, I added the lime juice with the bottled ranch and flavor packet (actually, the HALF flavor packet). Feeling it needed a touch more heat, in went some dried jalapeno... Let this sit for a while before you taste it again – let the flavors meld and then adjust to your liking. I ended up adding a dash each of cumin and dried chipotle powder, just to get a smokier flavor – by all means, play with it!
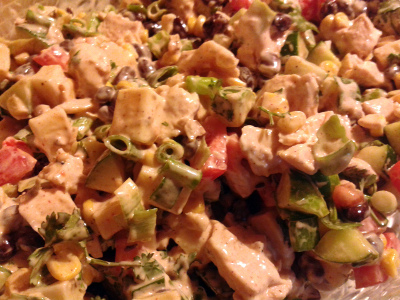 I ended up tossing the salad mixture (minus the lettuce) with the dressing, and then serving on a bed of chopped romaine, topping with some toasted pumpkin seeds (crushed tortilla chips were tempting, but remember, I wanted “healthyâ€).
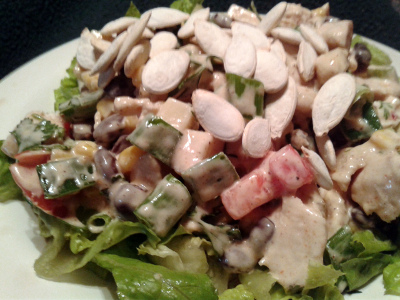 Colorful, tasty, covering all your food groups (tomatoes are fruit, remember?)... Definitely a keeper! Omit the chicken (if you choose) and you have a festive side dish for your next cookout or family gathering. Me, I'm gonna lunch like a queen


“Ancient Chinese Secretâ€
While that title might bring memories of a laundromat to some “of a certain ageâ€, this article has nothing to do with a humorous, though politically incorrect television commercial. It will, however, bring you a centuries old technique for a delicious quasi-healthy beverage that you can make for pennies and tailor to your own personal tastes. You ready?
While according to WebMD the jury is still out on the positive claims of Kombucha, I had to try the simple fermentation method. I mean, Kombucha seems to be EVERYWHERE right now  Never one to do anything half-way, I now have a new dedicated gallon glass jar, six pint sized “easy cap†glass bottles, and the all important scoby. After the nominal setup expense, I can and have made an entire gallon for what one 16oz bottle cost at my local health food store! Keep reading...
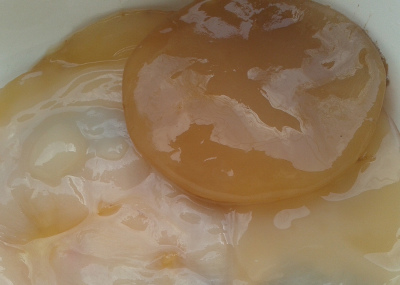
 Meet my new “petâ€. A scoby is a kind of gross looking amalgamation of yeast and healthy bacteria. It feeds off of sugar and fresh air. If you're doing it right, with each new batch you will generate a new scoby! I now have my third gallon of Kombucha aging, and actually that is the second generation – here's one of the first mom and baby scoby.
 First things first – cleanliness is of utmost importance! You are INTENTIONALLY growing bacteria – you do NOT want any BAD bacteria to take up residence!!! If you've ever made homemade wine or beer you understand this point – so don't skimp on that boiling water! When you're satisfied that your master container (the gallon jar) is sterile, cover it while you brew a gallon of tea (I use 4 bags each black and green tea and distilled water) and add a cup of sugar. Cover and let cool to room temp. Transfer to your jar, gently add the scoby and some plain kombucha from a previous batch, cover with a finely woven cloth held in place by a rubber band... and wait.
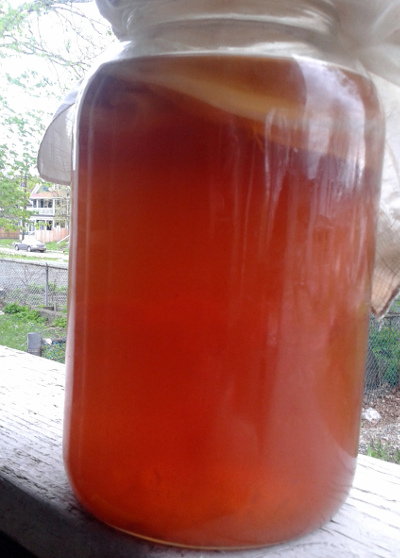 It's still mostly in the 50's here, so I've been letting my potion go two weeks for this first step - it will go faster in warmer weather. Try not to peek too often, but if you do, you'll start to see the growth of the new “baby†while the liquid actually gets somewhat lighter in color. Ideally you'll catch a whiff of vinegar as you walk by, and that's ok – in fact, that's great. NOW comes the fun part!
 My first gallon I wasn't sure what flavor I would get or more importantly, what I would LIKE the best – so I kept some plain, and tried three variations I'd found online: strawberry mojito, turmeric/ginger/lemon grass, and apple cinnamon. I added the “extras†to each bottle, filled them from my master, sealed, and stored in a dark place for a few more days.
 All of them were pleasant – the turmeric had an almost smoky flavor to it; the apple tasted just as expected, with a slight tingle to it reminiscent of cider about to turn(?), plain is going to be delightful on a nice hot day – but I gotta say – the Strawberry Mojito blew me away!
 I've rambled enough about my new “pet†for today – I'll be posting some more details and combinations soon, but for now,
 Gambei!
 Never one to do anything half-way, I now have a new dedicated gallon glass jar, six pint sized “easy cap†glass bottles, and the all important scoby. After the nominal setup expense, I can and have made an entire gallon for what one 16oz bottle cost at my local health food store! Keep reading...


Lunch for a week or a crowd – in 15 minutes!
If you've scrolled through this page more than once, you might have noticed that I enjoy the Asian palate. That's a bit over simplified, like there are SO MANY styles of Asian cooking – but most come down to a balance of sweet and salty and contrasting textures, all kept in somewhat a simple, pure form. Whew – enough waxing poetic – let's eat!
This salad is more of an American interpretation of eastern style, bit is incredibly easy and quick. Oh, and so yummy! The recipe for Mandarin Pasta Spinach Salad with Teriyaki dressing provides a great guideline you can tweak to make your own.
For starters, I wanted this for a few light meals, so I poached a chicken breast to add to the mix  I'd used more spinach than I'd planned in the Lemon Cream Chicken, so I used kale instead. And I totally forgot to add the nuts, lol!
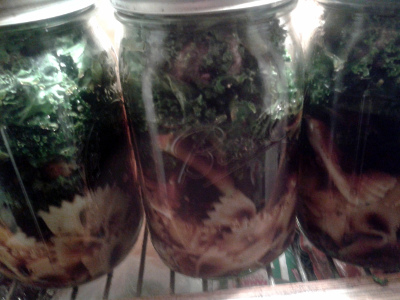 I doubled the recipe and layered the ingredients into 3 quart jars – it was a little too much to eat in one sitting and too tightly packed, so I should have spread it to four... I like the jar technique – you put the dressing on the bottom, the heaviest ingredients next, and keep your greens on top. So for this: the dressing minus the oil, then the oil (I find it easier to keep the balance visually than continued shaking!),
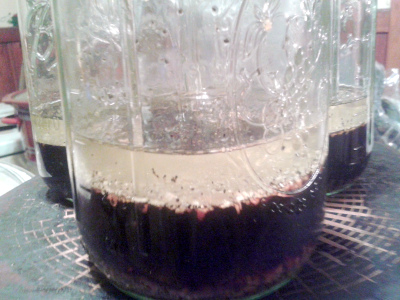 then the pasta, oranges,
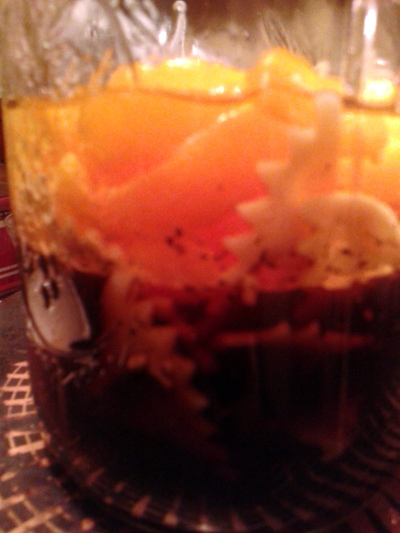 shredded chicken, craisins,
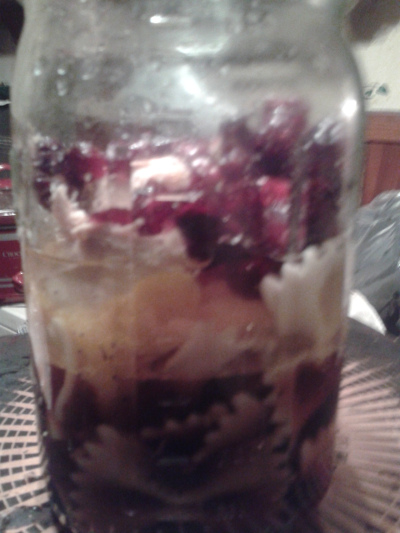 and greens. Store in the fridge and they usually can last at least a week. Shake before serving (another reason four jars would have been better) and pour into/onto your serving dish.
The dressing is addictive, and everyone who came into the break room today asked me what smelled so good – and THAT was before they got a good look!
 Gorgeous, isn't it? The sweetness of the fruit against the saltiness of the teriyaki... The tender chicken, the crunchy kale... A touch of heat from some red pepper flakes would put this over the top! All that with virtually no effort – a winner indeed
 I'd used more spinach than I'd planned in the Lemon Cream Chicken, so I used kale instead. And I totally forgot to add the nuts, lol!


Another Easy Date Night Dinner!
I've been in a rut lately – work hours have been changing almost daily – and when you don't even know WHEN you can cook, well, it's easy to rely on some lazy standards. [As a side note, I've discovered that sharp cheddar, banana peppers, and bacon make an excellent combo for quesadillas!]
When some time finally presented itself a touch of easy elegance was in order! How does Lemon Butter Chicken sound? In addition to the obvious ingredients it also has cream, parmesan, spinach... Hungry yet?
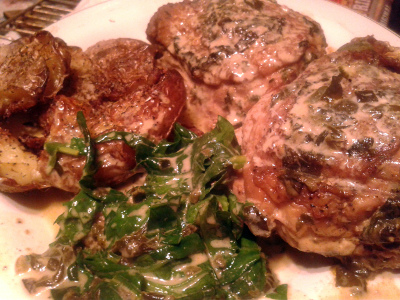 You use thighs, which practically guarantees that the meat will be flavorful as well as moist. Simply season and sear. It seemed like an awful lot of smoked paprika (2 Tbsp), but in the end that flavor wasn't noticeable (unless you were tasting for it?)... Then you saute some garlic, add your liquids and cheese – honestly, there's very little effort involved!
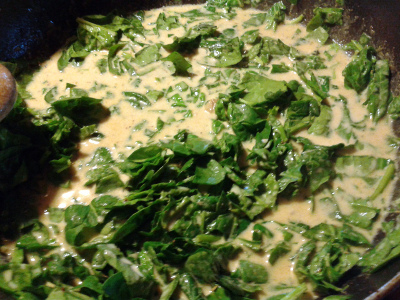 So now you get to the spinach – this is my one quandary regarding this recipe. IMHO there's too much of it to “pretty up†the sauce, and not enough to serve it as the vegetable?
 Use your own judgment. What I ended up doing was chopping a few more handfuls of spinach and quickly wilting it in the remaining sauce (you might notice the slightly different shades of green? That's why
  )
)
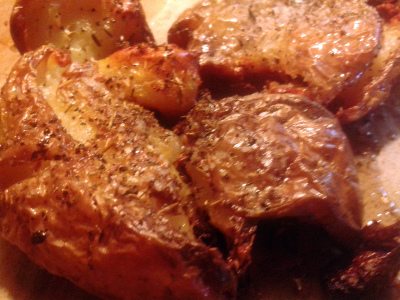
 I served â€smashed potatoes†thinking that the simple flavors and crisp texture would be a great complement – it was. I boiled the potatoes the night before and yes, gently “smashed†them! I used my had and a towel so I didn't have as much texture as Ree, but her technique is as simple as it gets.
 They got pulled out of the fridge as I started the chicken and went into the oven at the same time, leaving the potatoes in a touch longer while I plated the rest.
 Yet I think my plate could have used a bit more color – basic stewed tomatoes, yellow squash, a pretty salad (simply cucumber and tomato with a light lemon vinaigrette would be excellent)... or white rice with a bit of pimento tossed in instead of the potato? Keep the flavors simple and let the lemon butter sauce be the star – it deserves it! Some good bread to mop your plate with wouldn't hurt!
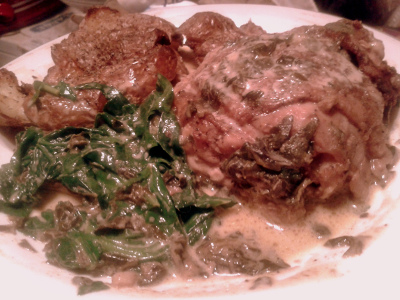 Simple measurements and prep, do ahead stuff, no-fail timing... Trust me, you can do this!


 Use your own judgment. What I ended up doing was chopping a few more handfuls of spinach and quickly wilting it in the remaining sauce (you might notice the slightly different shades of green? That's why
  )
)


This is so good it will convert "Haters"
And it's made with BRUSSEL SPROUTS?!? Seriously folks, you have to try this one, even if you KNOW that you don't like those little cabbage thingies – it's THAT good  I've admitted in the past that I had not found pleasure from Brussel Sprouts until just a couple years ago. My family serves them at every gathering now, and while everything tastes better with bacon believe it or not, I wanted a change.
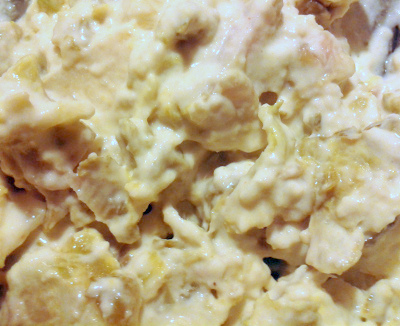 This recipe satisfied both that desire and my scarce time and energy (retail is a nightmare leading up to any holiday)! Three kinds of cheeses with three savory elements... A beautiful balance of flavors. You do a little chopping and grating (which I did the day before) and then dump your ingredients into the slow cooker in stages. Slice a baguette or serve with crackers... And it's beautiful!
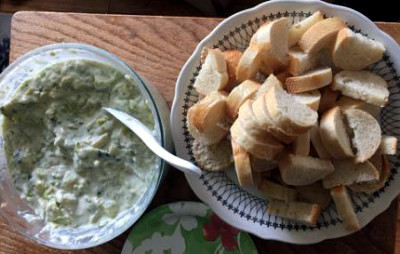 I opted for packaged shredded cheeses, choosing Swiss instead of Gruyere (at $20/lb for the aged stuff that was a no-brainer) and then buckled down on the chopping. Shallots and garlic I could do in my sleep, but the sprouts?!? I tried a couple in the food processor and all I got was mush – so I followed the example in the video – slice in half and then slice into shreds. Easy enough, but allow some time – two pounds is about a HUNDRED of those little thingies!! Over three cups when done!?
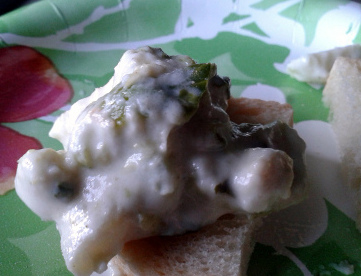 I made a full batch (and DO include the nutmeg – NOT optional in my book) and it was a ton (at least 8 cups)! Also, in my slow cooker it took about twice as long as indicated. The amount didn't phase me – leftovers of anything cheesy is a good thing! I just want you to be aware and feel free to cut the recipe in half... the FIRST time you make this
  Sixteen thumbs up from my crew – a definite keeper.
 I've admitted in the past that I had not found pleasure from Brussel Sprouts until just a couple years ago. My family serves them at every gathering now, and while everything tastes better with bacon believe it or not, I wanted a change.


 Sixteen thumbs up from my crew – a definite keeper.
Prepping Bundt Pans
Chocolate for Breakfast asked this question about bundt pans: "Whenever I purchase a fancy one I fail to grease it appropriately and half the cake stays in the pan. I'm not a big fan of sprays. What's your experience? "
She was talking in particular about the fancy ones...
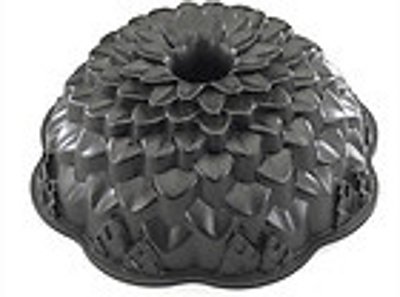
 There were many ideas posted, including my favorite ATK ( 1- use a spray, and then use a brush to make sure you coat all those details, then flour; and 2- when making a chocolate cake, use cocoa powder instead of flour!)... But the idea I liked the BEST came from Chris Eileen P., a reader who suggested the following:
“Make a 'bakers spray'-like spread - super cheap without the "cloud" . Beat together 1 cup vegetable shortening, 1 cup flour and 1/2 cup oil until smooth. Store in a tightly covered dish in pantry. It does not need to be refrigerated.
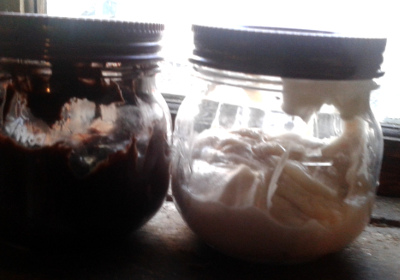 Spread on pan with coffee filter, which eliminates fibers left behind like paper towels (or my preference, a pastry brush
  ). Use enough to make a haze on pan but not too globby."
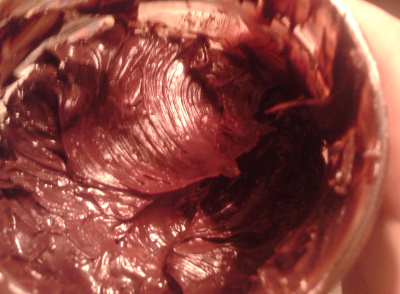
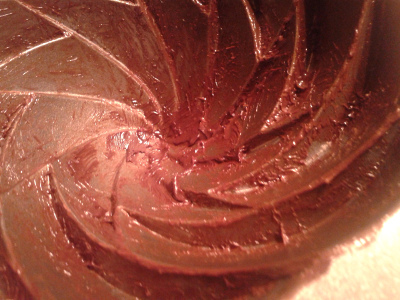 I saw no reason that this same formula wouldn't work substituting cocoa powder for the flour... It works BEAUTIFULLY!
 So GO for the fancy – and use some kewl tricks when you do!

like this, with a lot of detail.
Beautiful when they work, but nightmares when bits of your cake get STUCK in those crevices  There were many ideas posted, including my favorite ATK ( 1- use a spray, and then use a brush to make sure you coat all those details, then flour; and 2- when making a chocolate cake, use cocoa powder instead of flour!)... But the idea I liked the BEST came from Chris Eileen P., a reader who suggested the following:
“Make a 'bakers spray'-like spread - super cheap without the "cloud" . Beat together 1 cup vegetable shortening, 1 cup flour and 1/2 cup oil until smooth. Store in a tightly covered dish in pantry. It does not need to be refrigerated.

 ). Use enough to make a haze on pan but not too globby."


A Pot of Love – in an HOUR!
A friend of mine tagged this recipe for Pasta e Fagiola a couple weeks back, and it looked so good I immediately put any ingredients I didn't have on my shopping list. Things got busy (I don't want to tell you the junque I've been eating!) but yesterday was the day!! You're gonna love this one  Honestly, the most difficult part of this recipe is chopping the onion and dicing the prosciutto – I could only find paper thin slices, so cutting and separating all the bits was a challenge. My dog sat anxiously at my feet the entire time, just HOPING against hope that I would drop some, lol. I didn't bother slicing the garlic – through the press it went.
Really straightforward, from then on it's pretty much open cans and go. I opted for half a jar of meat flavored sauce rather than the canned suggested – and I think I lucked out on that. Here's why...
The ONLY thing wrong with this recipe is that there is too much pasta! I wish I'd gone with my gut and only cooked half a pound – but I checked THREE times and it said to use the full pound, so...
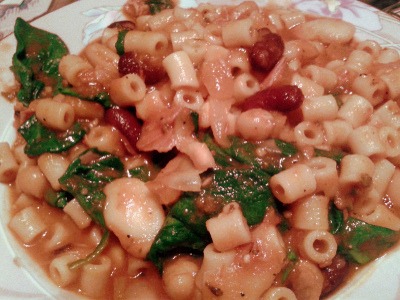 There really IS broth underneath, and the first serving of this was delicious! The flavors are subtle as each of the four beans shine through, which I liked - and the dish still leaves room for adjustment if you desire.
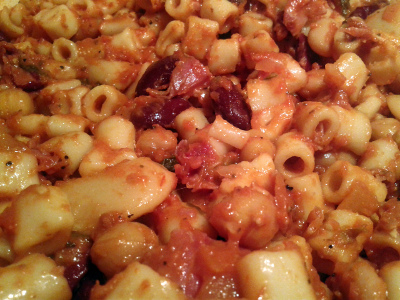 But this is the next day! The pasta, as always, absorbs more of the liquid. Using the remaining tomato sauce and a couple more cups of broth I'll be able to enjoy the next several bowls as well
  Also, you COULD always spread it out in a casserole dish, slather with cheese and bake...
 I love having options <3
ps. I opted for spinach instead of arugula – I was much more likely to use it all. I only added a handful each time I heated/reheated – that way it still added freshness to each bowl.
 Honestly, the most difficult part of this recipe is chopping the onion and dicing the prosciutto – I could only find paper thin slices, so cutting and separating all the bits was a challenge. My dog sat anxiously at my feet the entire time, just HOPING against hope that I would drop some, lol. I didn't bother slicing the garlic – through the press it went.
Really straightforward, from then on it's pretty much open cans and go. I opted for half a jar of meat flavored sauce rather than the canned suggested – and I think I lucked out on that. Here's why...
The ONLY thing wrong with this recipe is that there is too much pasta! I wish I'd gone with my gut and only cooked half a pound – but I checked THREE times and it said to use the full pound, so...


 Also, you COULD always spread it out in a casserole dish, slather with cheese and bake...

Want to hone your baking skills?
I recently came across this article from 'Food and Wine', and the game was on! I hadn't made any New Year's Resolutions, and this mission to bake a cake a month, each requiring a slightly different technique and skill set seemed a delightful goal. A whole lot easier than cooking through a Julia Child masterpiece, too  January's cake is Citrus Angel Food Cake. As I had just recently made Lemon IceBox Pie for a work event, I actually had NINE extra large egg whites in the freezer – which was amazingly the exact amount called for – this seemed like fate!
Well, as always, there was a hitch – I had no lemons. Even stranger, I had no bottled lemon juice or dried lemon zest? All three are staples, and yet... BUT – I DID had lemon extract!! A heaping teaspoon went into the sugar to saturate.
Started to whip the egg whites (with cream of tarter and vanilla) to the soft peak stage - so far so good.
 But when I started to add the flavored sugar everything went flat. Literally. Egg whites don't like fat, and while fresh zest has it's share of natural oil, apparently the extract had more. I had everything else measured out, so I kept on going if for no other reason than to show how easy it is to fail, lol.
No, I didn't take a picture of my deflated whites – it just looked like any other cake batter...
Folded in the flour mixture, spooned into my antique tube pan (I'd cut a piece of parchment to fit the bottom for easy removal), put in the oven and waited.
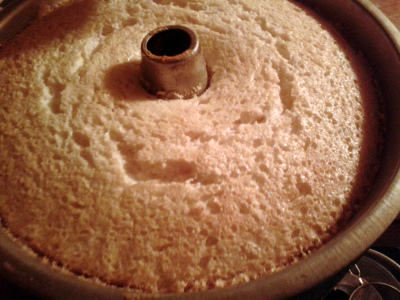 Okay, it inflated some more!
 And while I couldn't find a bottle that would fit through the tube of the pan, this goblet worked...
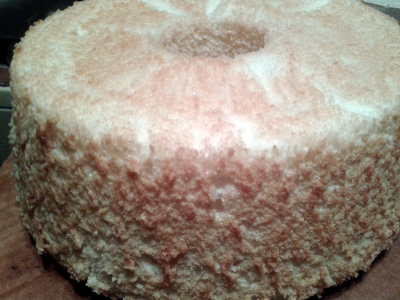 Not bad!!! Not bad at all!
The recipe includes the ingredients for a glaze, but not the instructions – but you simply whisk them together. If I'd had sliced almonds, or maybe some white chocolate shavings I might had added a handful – but sprinkles were enough to make it pretty.
 Kind of looks like a doughnut, doesn't it?
 Not bad!
Now, for the lessons from my Cake #1 in this challenge: Fresh lemons and zest would be better; make sure your Cream of Tarter is fresh (mine was a little dated, and I could feel some coarseness in a couple bites?); and most important!!!! Don't give up if it doesn't look or seem quite right! It may not be perfect, but it can still be enjoyable
 January's cake is Citrus Angel Food Cake. As I had just recently made Lemon IceBox Pie for a work event, I actually had NINE extra large egg whites in the freezer – which was amazingly the exact amount called for – this seemed like fate!
Well, as always, there was a hitch – I had no lemons. Even stranger, I had no bottled lemon juice or dried lemon zest? All three are staples, and yet... BUT – I DID had lemon extract!! A heaping teaspoon went into the sugar to saturate.
Started to whip the egg whites (with cream of tarter and vanilla) to the soft peak stage - so far so good.


I hadn't even THOUGHT about New Year's Eve
In case you've missed it, I work in retail - and I profusely apologize for ignoring you lately. I've made some good, even a couple GREAT things – but once I've sat down recently, I've had a tendency to fall asleep  No worries – I'll have a chance to catch you up soon!
Even grocery shopping has been a struggle, so my cupboard is kind of bare – at least for me. I took the chuck roast out of the freezer without ANY plans on what I'd do with it. Several recipes I'd bookmarked would have worked, but in each case I was missing what I considered an important ingredient – but THEN!!!!
How could I have forgotten this one! Coffee and Spice rubbed roast had sounded amazing when I first came across it, and what a treat for New Year's
  Not at all complicated – you salt and pepper the roast, tied if it's that type (mine didn't need it), wrap and chill.
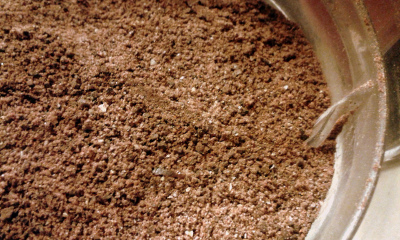
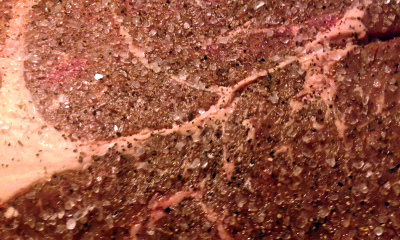 I used my coffee grinder to blend all the incredible flavors – actual coffee grounds (I used a breakfast blend), smoked paprika, brown sugar, onion powder...
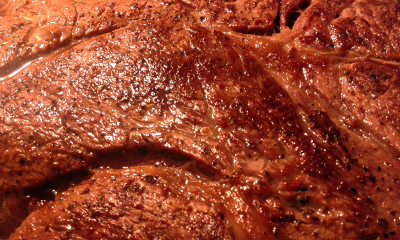
 So the next day, or even a few hours later you unwrap the meat, pat it dry, and sear...
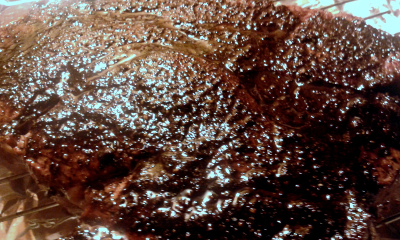
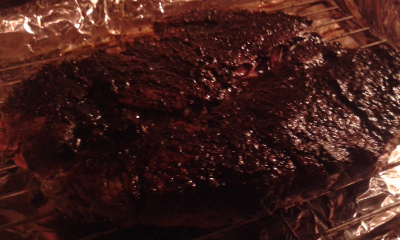
 I used some of the warmed oil to turn the spice blend into a paste – and then schmeared!
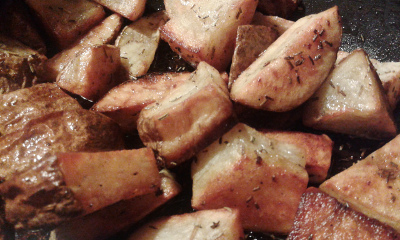
 Some rosemary potatoes went into the oven while this happened, and then while the oven cooled back down to the “low and slow†225F, the flavors seeped into the meat, resting at room temp.
 My chuck roast was about 2†thick, and an hour was perfect for a medium rare finish. A minute or two under the broiler ensured a delightful crust.
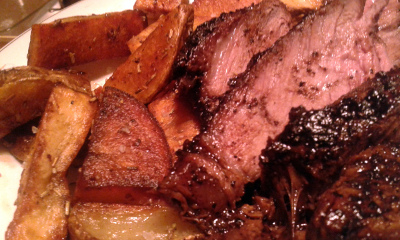 A simple green salad, coffee ice cream for dessert... Happy New Year!!! This is a wonderful treat – for ANY time.
 No worries – I'll have a chance to catch you up soon!
Even grocery shopping has been a struggle, so my cupboard is kind of bare – at least for me. I took the chuck roast out of the freezer without ANY plans on what I'd do with it. Several recipes I'd bookmarked would have worked, but in each case I was missing what I considered an important ingredient – but THEN!!!!
How could I have forgotten this one! Coffee and Spice rubbed roast had sounded amazing when I first came across it, and what a treat for New Year's
  Not at all complicated – you salt and pepper the roast, tied if it's that type (mine didn't need it), wrap and chill.


News Categories


 ***********************
